Do you want to capture what’s happening on your PC screen? Whether it’s a cool game, a fun video, or an important meeting, you can record it all with iTop Screen Recorder. It’s a reliable and easy-to-use software that gives you high-quality videos.
There is no need to be a tech expert to use this application. Just click a button and start recording. You can also edit your videos with the built-in editor. You can trim, crop, add effects, and more. Then you can save your videos and share them with anyone you want.
iTop Screen Recorder makes screen recording simple and fun. In this article, you will learn a simple 5-step process about how to record screen and audio at the same time using iTop Screen Recorder.
So, let’s get started and keep reading!
How to Record Screen and Audio Simultaneously Using iTop Screen Recorder? [5 Steps]
iTop Screen Recorder is one of the most reliable screen recorder applications for PCs to capture any video clip or record screen with high-quality audio sound that actually provides a lot of solutions to the user’s needs.
Now, we will discuss an easy 5-step process about how to record screen and audio at the same time using iTop Screen Recorder.
So, start reading now. Happy learning!
Step#1: Downloading and Installing iTop Screen Recorder Software on Your PC.
First of all, you have to download the iTop Screen Recorder application free of charge and install it on your laptop or PC. It is also compatible with Windows 7, 8, 10, and 11.
Step#2: Setting up General Preferences.
After launching iTop Screen Recorder successfully on your PC. You can go to “Settings” and make your customization things if necessary.
For instance, to adjust your desired video parameters, simply click on “Format > Video,”. Then, set the size (resolution), format, frame rate, bit rate, quality, etc.
Step#3: Key Settings To Record Screen and Audio All Together.
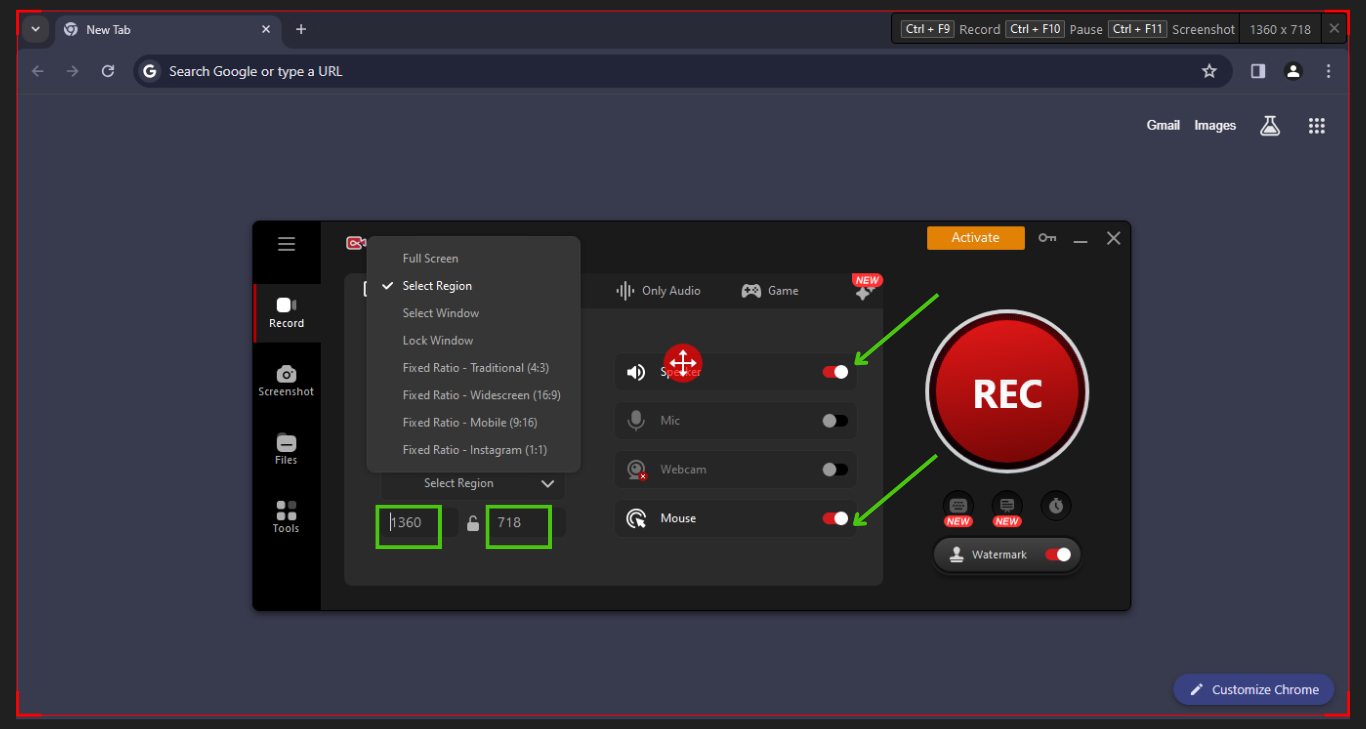
In the record tab, you need to click the right side little drop-down arrow to select your preferred recording area with customizing width and height.
Make sure, you have turned on the “Speaker” only to record screen and audio at the same time. Also, the “Mouse” option is turned on.
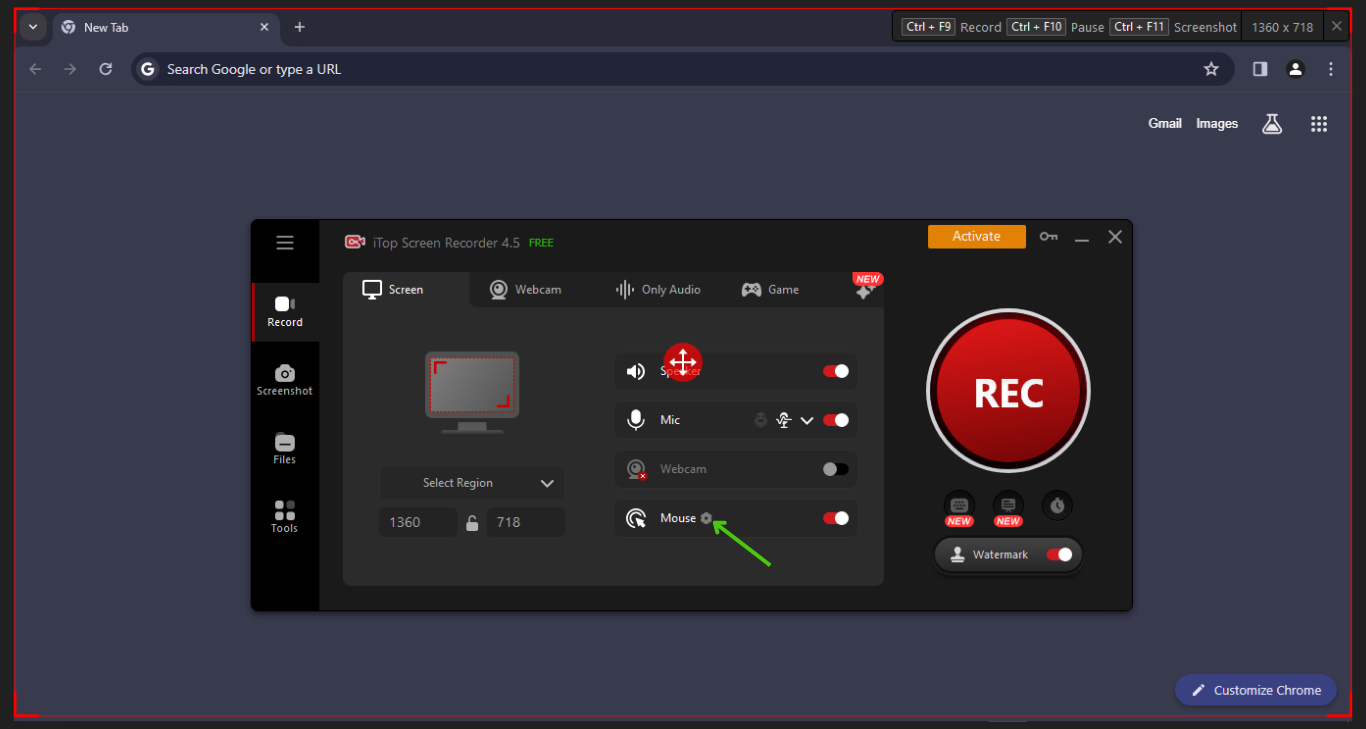
Turn on the Mic and Webcam [if you want to show your face] to record the screen with voice and yourself simultaneously.
For this tutorial purpose, we didn’t turn on the Webcam.
Now, click on the “Mouse” option and its right-side little gear icon to set up some effects (if you want to record your mouse clicks)
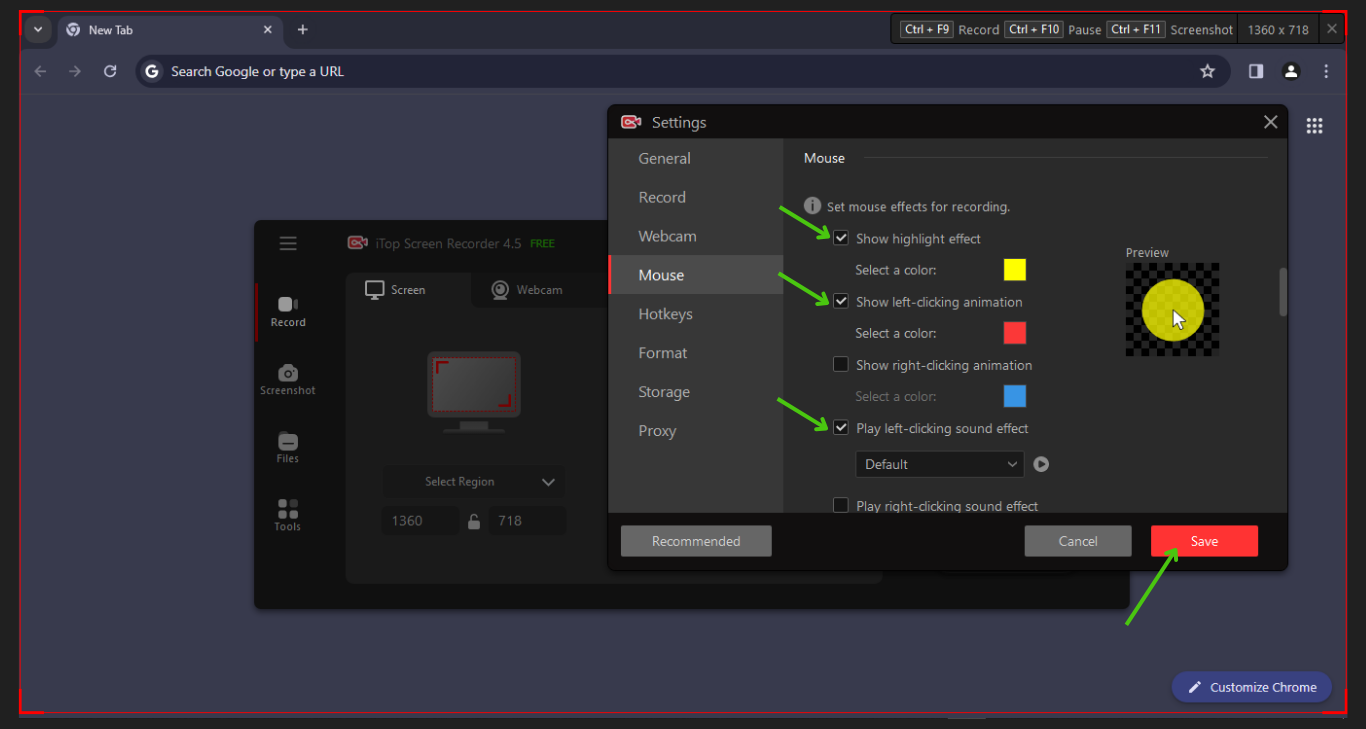
After clicking on the gear icon, a new pop-up interface will appear. Then apply the checking mark based on your needs.
When you are okay with your settings, Click on the “Save” button. See the below image to understand easily:
Step#4: Start Recording and Stop the Recording Button Based on Your Needs:
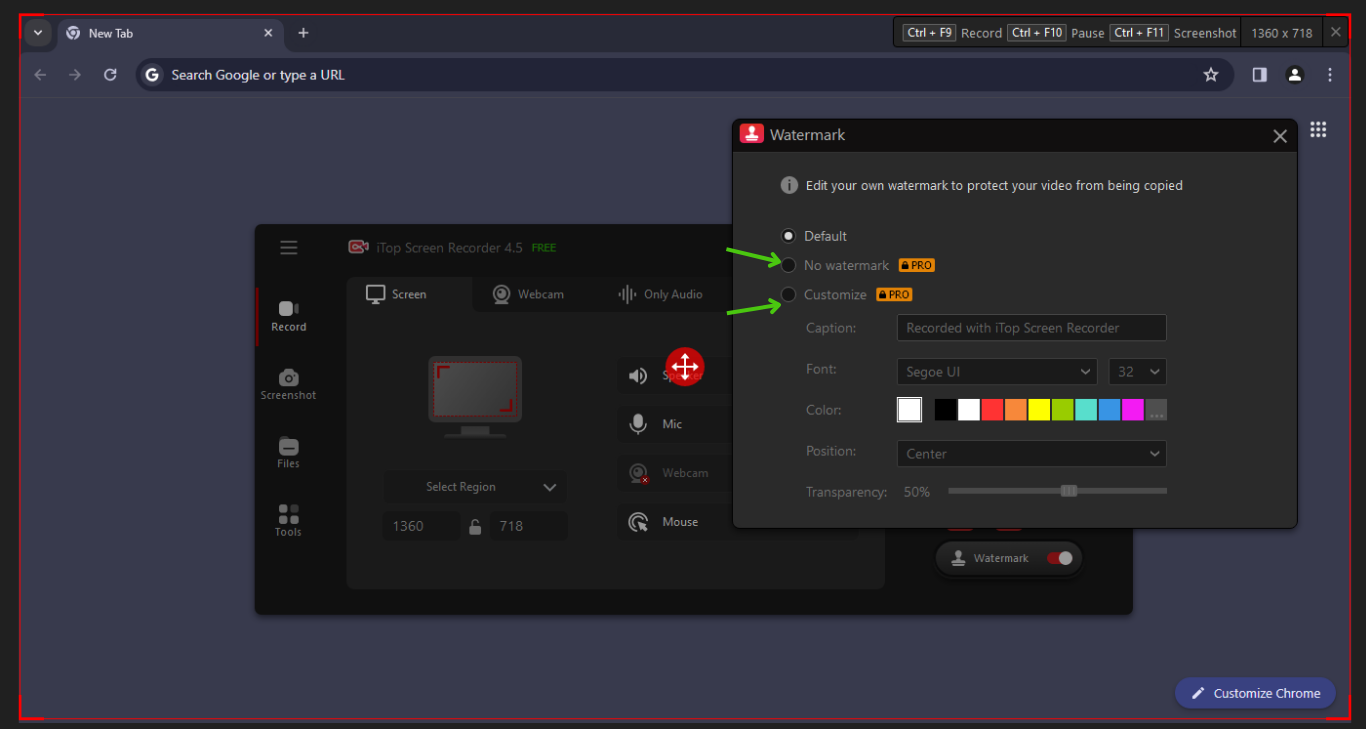
Next, you will see a “Watermark” option which is set up by default. Click on it and a new pop-up will appear.
There are some options:
Default (free to use)
No watermark and Customize (To use these features, you need to buy the premium package)
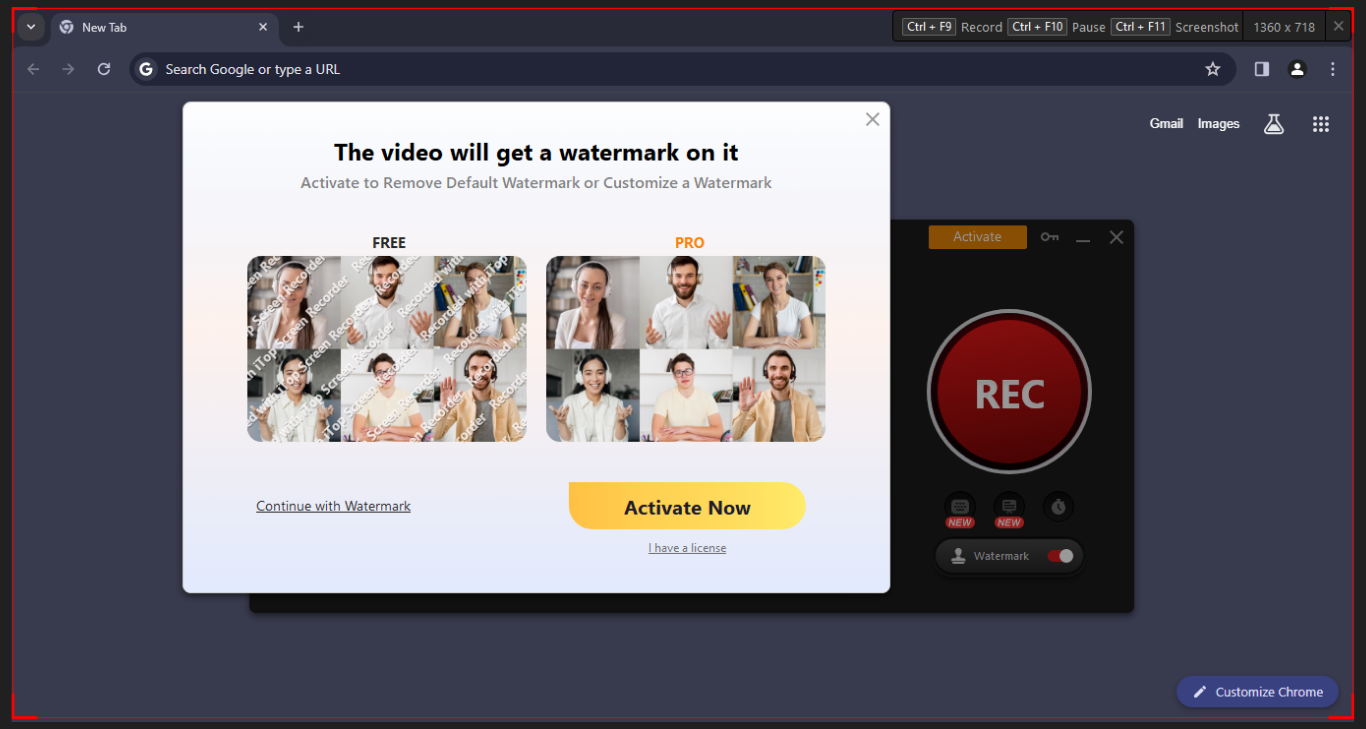
Pressing the “REC” red button to start your recording.
Here, you can get two options:
– continue with Watermark ( you may see by default watermark on your recorded video)
– Activate Now (you won’t see any watermark on your recorded video if you buy any PRO plan)
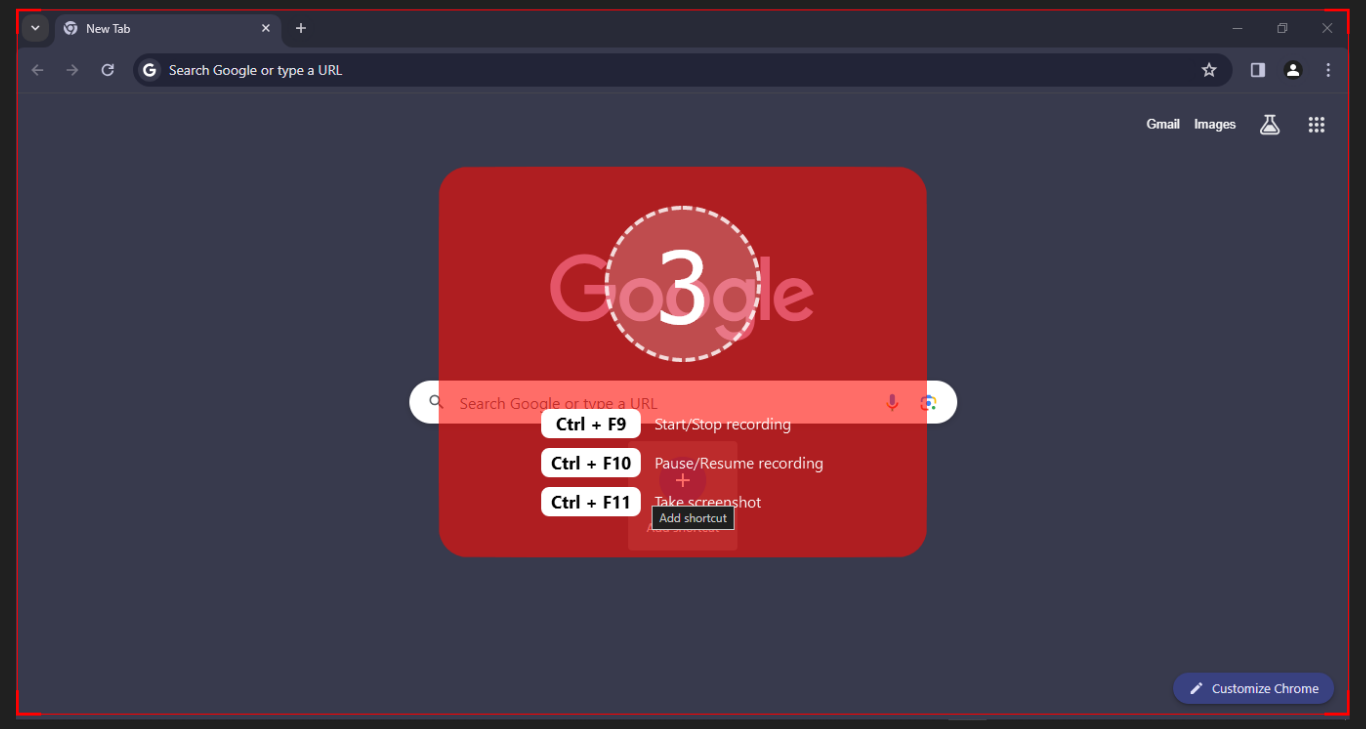
 Next, see the 3-second Countdown, and then your recording is turned on.
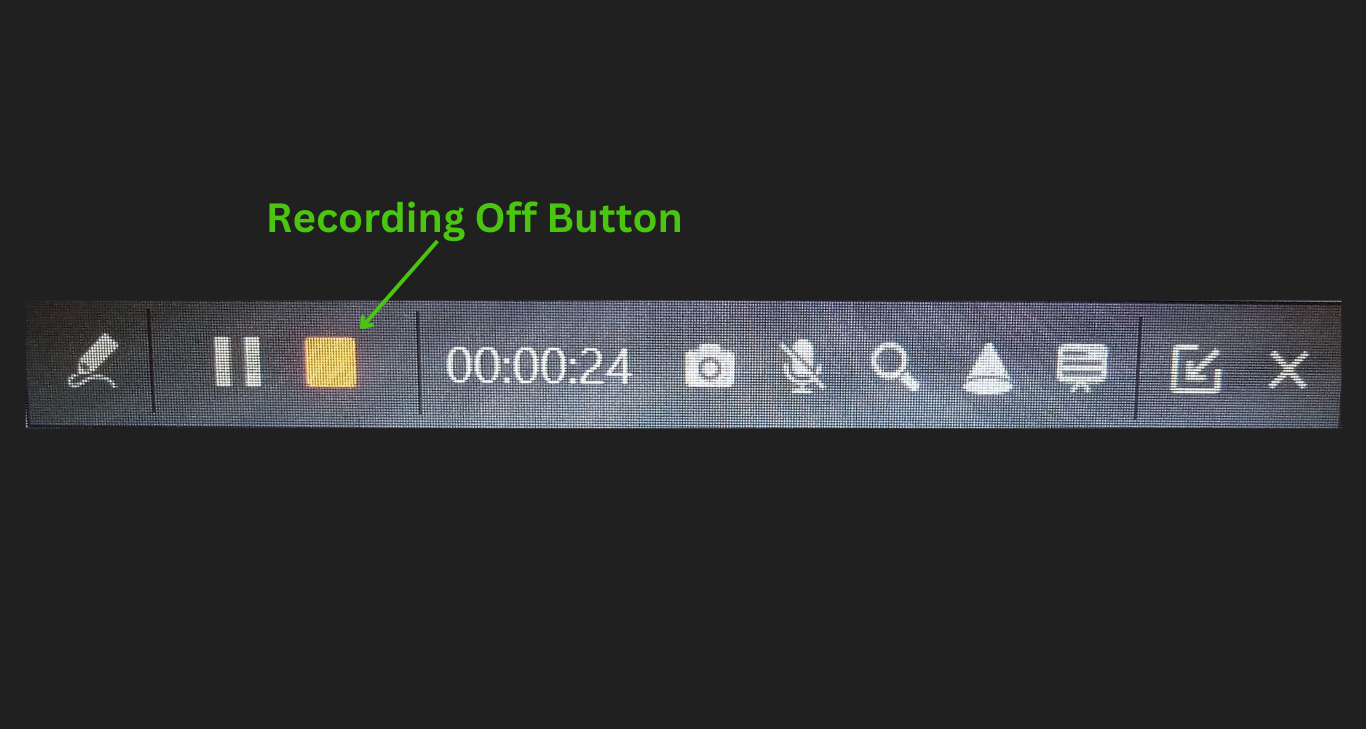
By clicking on the recording off button, you can stop your recording.
Step#5: See and Edit Your Screen-Recorded Video:
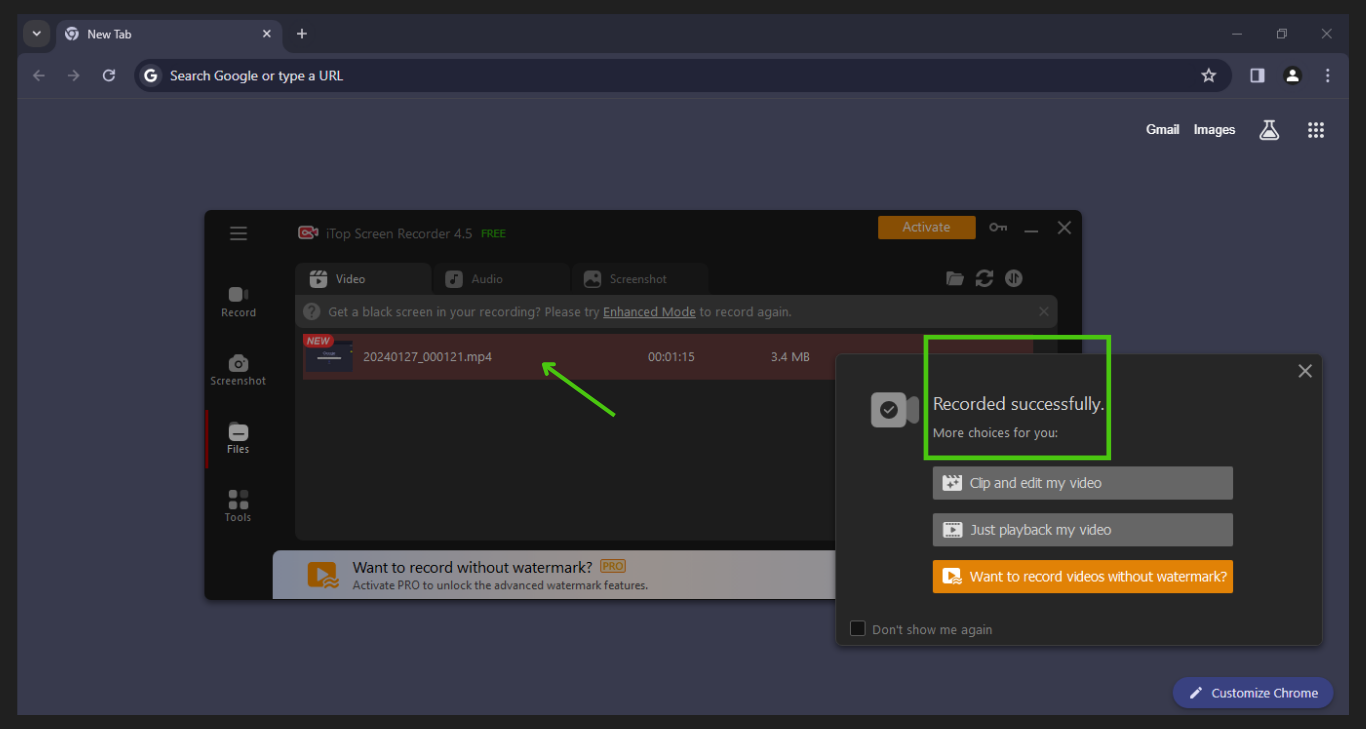
After clicking on the recording off button, your screen-recorded file will be saved successfully under the files section. Also, you will get a new pop-up with several options. See the below image to get the points quickly.
This option is not mandatory. If you want to edit your recorded video slightly, you can click on the 1st option (Clip and edit my video)
then you will see the below new editing interface where you can add many cool features ( marked on the left-upper side) to your video and also edit your recorded clips, audio, and other key things.
When you are fully satisfied with your editing process, then click on the “Save” button or export your recorded file. Here are the screenshot image attached below:

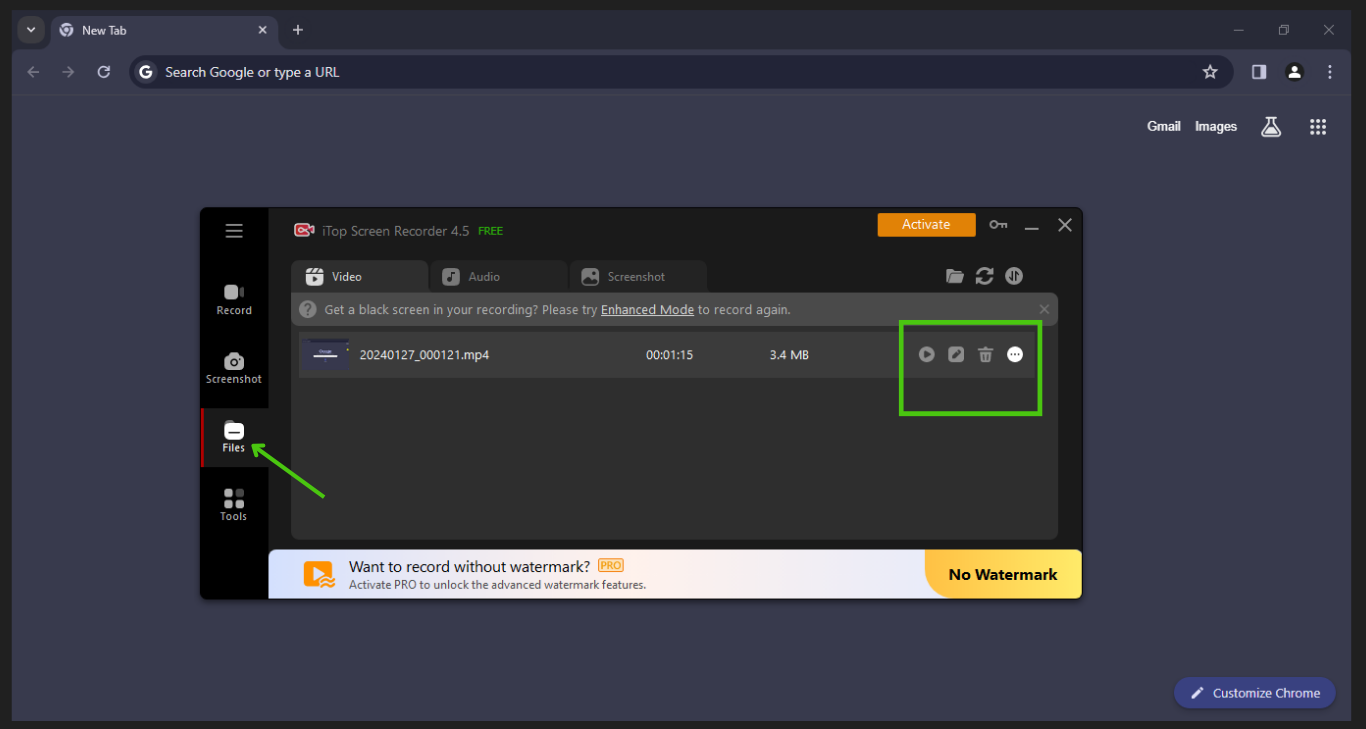
Finally, you can see your polished screen-recorded file in the Files section and also can preview, edit, delete or do more things whenever necessary according to your needs.
Key Benefits of Using iTop Screen Recorder:
1. All-round screenshot tool with a user-friendly dashboard.
2. Powerful webcam recording with mind-blowing virtual background.
3. HD gaming recording without any FPS drop and lag.
4. Easy-to-use video editing sections.
5. Full-featured screen recorder with 4 recording modes at no cost.
6. High-quality audio recording with own voice or AI voice changer.
7. Easily screen and video recording in HD quality.
Final Notes about How to Record Screen & Audio together with iTop Screen Recorder:
In a nutshell, by following the above five step-by-step processes, you can effortlessly record high-quality video tutorials, presentations, and many more with the iTop screen recorder application instantly!
iTop Screen Recorder is more than just software. It’s a smart solution-based tool that helps you record your PC screen with ease. Whether you want to record a game, a video, or a meeting, you can do it with iTop Screen Recorder.
Also, you can edit your recorded videos with the built-in editor interface while making them look so eye-catching and professional. iTop Screen Recorder is the best choice for screen recording.
Never miss this great opportunity to get it for free of charge. Download iTop Screen Recorder now and start creating your own videos today! Thanks for reading!
Follow TechStrange for more!